How to Install Free SSL in 15 Minutes // Dylan M Howell
Installing an SSL Certificate in 15 minutes, for free!
It is now 2019. Happy New Year! Want to spend 15 minutes making your website a bit better?
See that green lock in the top left of your browser? That’s a fancy way of showing off that my website is super secure and has a SSL certificate. The SSL certificate allows me to encrypt the data between my server and my visitors’ browsers.
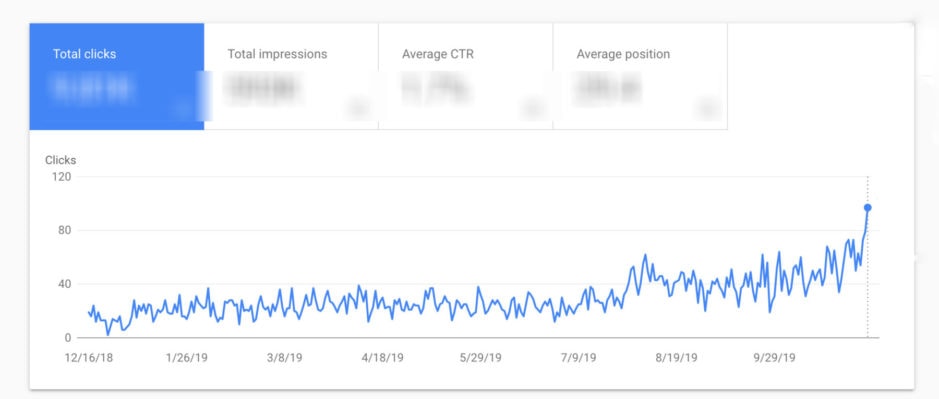
Google has been favoring sites that have a SSL certificate for the past year. There was a sizable shake-up in their algorithm last November and sites with SSL installed have seemed to bounce back at much higher rates.
Since January 1st, Google Chrome is giving a warning message when visitors browse on a site that doesn’t have a SSL certificate. They’re shaming websites into transitioning to https. SSL also allows for HTTP/2, which will make your site load faster and more efficiently.
Squarespace users, this is the one time I’m slightly jealous.. just click here and follow the two click instructions to a secure site.
Wordpress people.. stay with me.
Step One // Get a SSL Certificate
In the past, these certificates were anywhere from $50-200 a year. Kind of a bummer.
Last year, a company called Let’s Encrypt was formed to fix that problem. Their goal is to have the entire internet switch to https by making the service free and automatic.
So. First, check with your current web host. Hopefully they are one of the many that are already setup to add Let’s Encrypt. (List of hosts that support here.)
Log into your hosting and see if there is an option to quickly install a Let’s Encrypt SSL certificate.
If your host doesn’t play nicely, you can read the above link for manual installation.. just note that you’ll have to install every 3 months when the certificate expires.
Or I’d just buy an SSL through here or from your current host.
Step Two // Make the Switch
The fun part. Every reference to your website in your website’s code needs to say “https” instead of “http” or visitors will get a mixed content error when they visit your site. Luckily, there are plugins that can do this for you.
I’ve had good luck with this one, Better Search Replace. All you need to do is search for “http” and replace it with “https”. You can run it on all of the tables in the list and do not check replace GUIDs.
Now, you need to go into your Wordpress General settings and update your URL to the https version.
Check your site, see if you’re getting the green lock. If you aren’t, using Google Chrome’s developer tools will show you where the errors are coming from. Click View > Developer Tools > Console, and then load your site again. In the past, I’ve had to reload my logo and favicon because they were loaded through my previously un-secure backend in the theme.
If you’re still having issues, try this plugin, SSL Insecure Content Fixer.
Step Three // Redirect & Tell Google
Now that your site is working at its new https address, it is time to redirect from your old http address. If you have Yoast SEO plugin, go to Tools > File Editor and then put this code in your .htaccess file.
If this is going over your head or you’re having troubles, just contact your host’s tech support and they’ll help you get this redirect in place!
Tell Google
After you get the redirect, it’s time to let Google know about your change.
Log into Search Console (previously Webmaster Tools) and add your new https domain. Set it as the preferred domain.
Google treats this as a site move, so read these instructions. Don’t forget to update your Google Analytics code as well.
You’re all done! Congratulations on a more secure site.
If you’re interested in more tutorials on SEO for photographers, check out my Course!


![Google Updates Image Search [October 2018]](https://dylanmhowell.com/wp-content/uploads/2018/10/google-image-search-seo-photographers-1600x713.png)


The only issue, the facebook likes for all the posts are now gone.
Facebook treats http and https as different websites.
Did you find a fix for this ?
some sharing plugins let you manually adjust your counts, other than that I’d just start from scratch. Https is more important than like counts on old posts, in my opinion.
It shouldn’t matter actually. The links out there on Facebook will still function, they’ll just point to the http version rather than the https. Right, Dylan? That’s what’s been happening with my site and FB links at least.
OH, I see. Daniel, you mean likes on your actual site that are routed through FB.
I think about half of the plugins I’ve got running on my website are based off of your recommendations. Thanks, dude! u da best
great idea Daniel and was following instructions. Unfortunately my site is broken now after I did the replace with the plugin!! I now get that my site or wordpress as it says my site isnt working !! please help
restore a backup of your site! contact your host for help.
Also, try Really Simple SSL plugin instead of doing the manual redirect.
I was partially through setting up my SSL a while back and got stuck so thanks for this post Dylan. All working but for one slight problem. Im getting a console error with the Google Fonts https://fonts.googleapis.com/css?family=Palatino%2C+Georgia%2C+serif%27+rel%3D%27stylesheet%27+type%3D%27text%2Fcss Failed to load resource: the server responded with a status of 400 () – any ideas?
I just discovered that where I use forms on my site, which are linked to my Newsletter provider Campaign Monitor (ie. like Mailchimp), I had customised the landing page the subscriber is sent to after pressing send on the form. I put that link in through the Campaign Monitor dashboard, so I had to change my links to the https:// version. The links worked, but just didn’t format with the right fonts.
Dylan, your the best! Thanks for this tutorial. I’ve got one question, how do you use the plugin ‘ better search replace’? When i try to open it or edit it, all i see is a page with code….
This is great advice – I think Chrome have just started telling people sites are unsecure if they don’t have SSL now so perfect timing!
Thank you for this!!